

How to Remove Unwanted Objects from Photos for Cleaner Images
A small distraction can make a good photo feel unfinished. This guide explains how AI object removal helps clean images faster while keeping the final result natural and ready to publish.

In this article
Quick checklist
Even a strong photo can lose impact when the background contains distractions. A small object on a table, a person in the background, a wire, a stain, a shadow, or a random item near the subject can make the image feel messy. For ecommerce, social media, portraits, travel photos, and marketing visuals, those small details matter.
An AI object remover helps clean photos by removing unwanted objects and filling the area naturally. Instead of manually cloning pixels or repainting the background, you can select the distraction and let AI rebuild the surrounding area.
What is an AI object remover?
An AI object remover is a photo editing tool that removes selected parts of an image. You mark the object, person, blemish, clutter, or distraction you want to remove, and the AI analyzes the surrounding area to create a cleaner result.
This is useful when the image is already good, but one detail makes it look less polished. The goal is not to make a photo unrealistic. The goal is to remove visual noise so the main subject becomes easier to see.
When should you remove objects from a photo?
Object removal is useful across many everyday editing workflows. Here are some common cases:
- Product photos: Remove dust, small props, background clutter, price tags, or unwanted reflections.
- Portraits: Remove background distractions, small marks, or objects that pull attention away from the person.
- Social media images: Clean messy tables, walls, floors, or outdoor scenes before posting.
- Marketing visuals: Remove anything that competes with the product, model, or message.
- Real estate photos: Clean small clutter, cables, bins, or items that make a room feel less organized.
- Travel photos: Remove random people, signs, or objects that distract from the location.
A simple workflow to remove unwanted objects
The best results come from a careful but simple workflow. You do not need to edit everything. Focus on the distractions that actually affect the image.
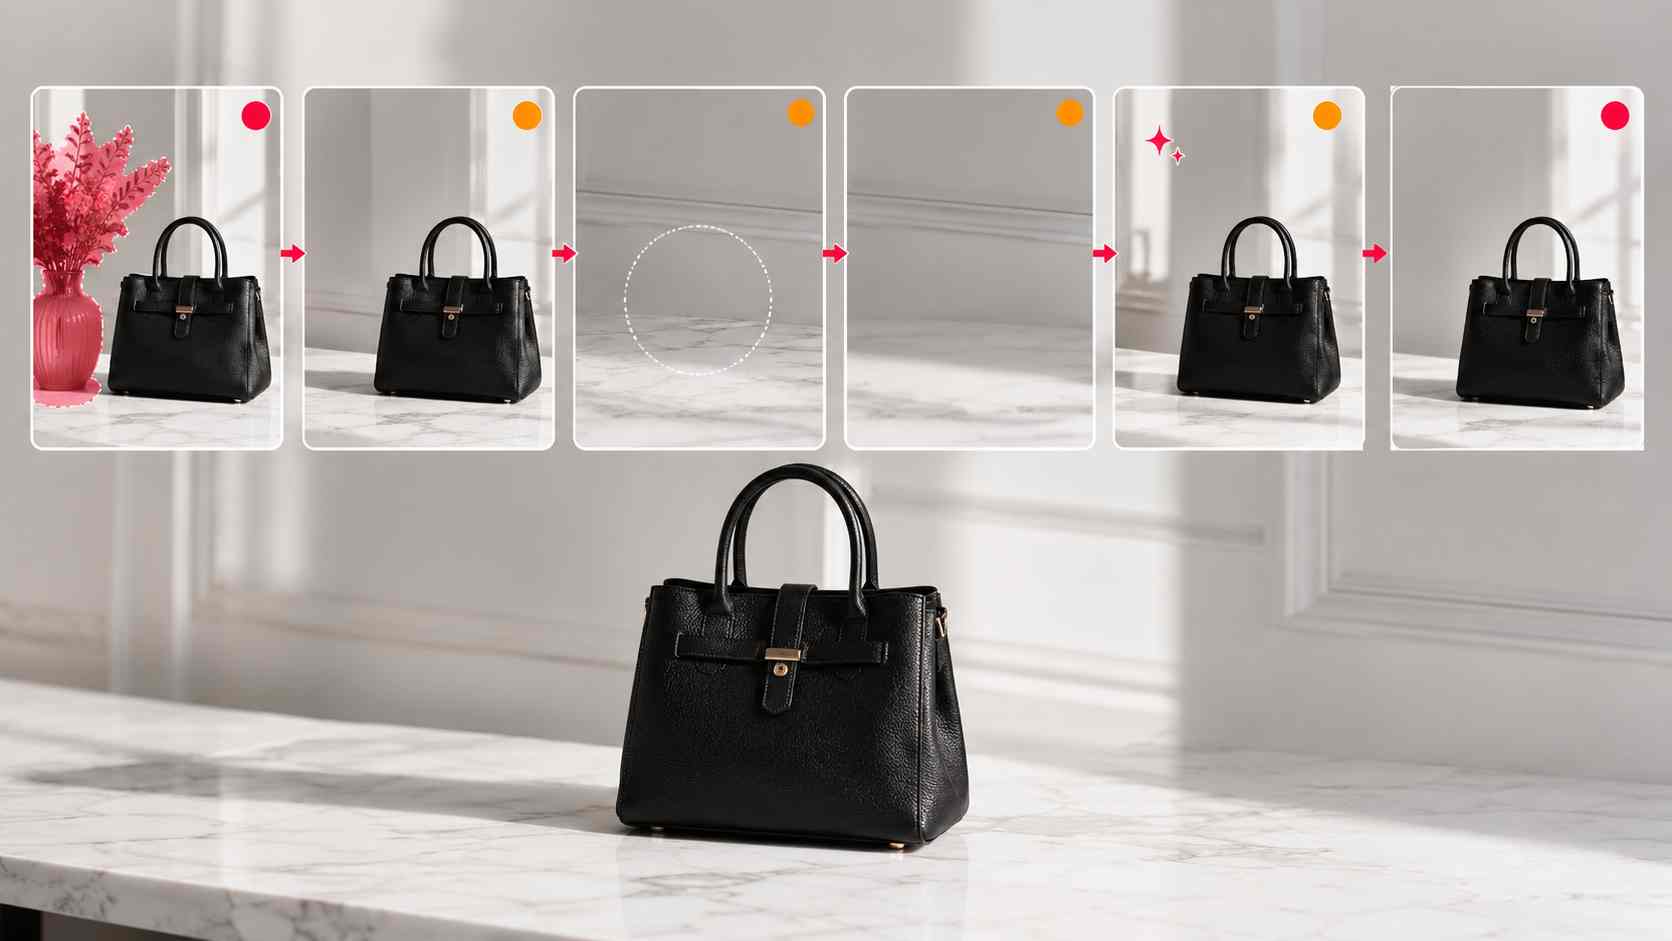
Step 1: Identify the real distraction
Before editing, look at the image and decide what truly needs to be removed. Not every detail is a problem. Remove objects that pull attention away from the subject, make the image look messy, or reduce trust in a product or brand.
Step 2: Select the object cleanly
Use the brush or selection tool to mark the object you want to remove. Try to cover the full object, including shadows or edges that belong to it. If you only select part of the distraction, the final result may leave fragments behind.
Step 3: Remove the object and review the filled area
After the AI removes the object, zoom in and check the edited area. Look for repeated patterns, strange textures, broken lines, or unnatural edges. Simple backgrounds are usually easier to fix. Complex areas like fabric, hair, reflections, tiles, or detailed scenery may need a second pass.
Step 4: Clean small leftovers
If the first result leaves small marks, run another cleanup pass only on the remaining problem area. Smaller selections can be more accurate than trying to remove a large messy area at once.
Step 5: Enhance and export the final image
Once the object cleanup looks natural, improve the image with light enhancement if needed. Adjust clarity, brightness, and detail carefully, then export the image in the right format for your use case.
Before and after: why object removal improves images
Object removal works best when it supports the main goal of the photo. For a product photo, the product should feel clean and trustworthy. For a portrait, the person should be the focus. For a social post, the image should feel clear at a glance.
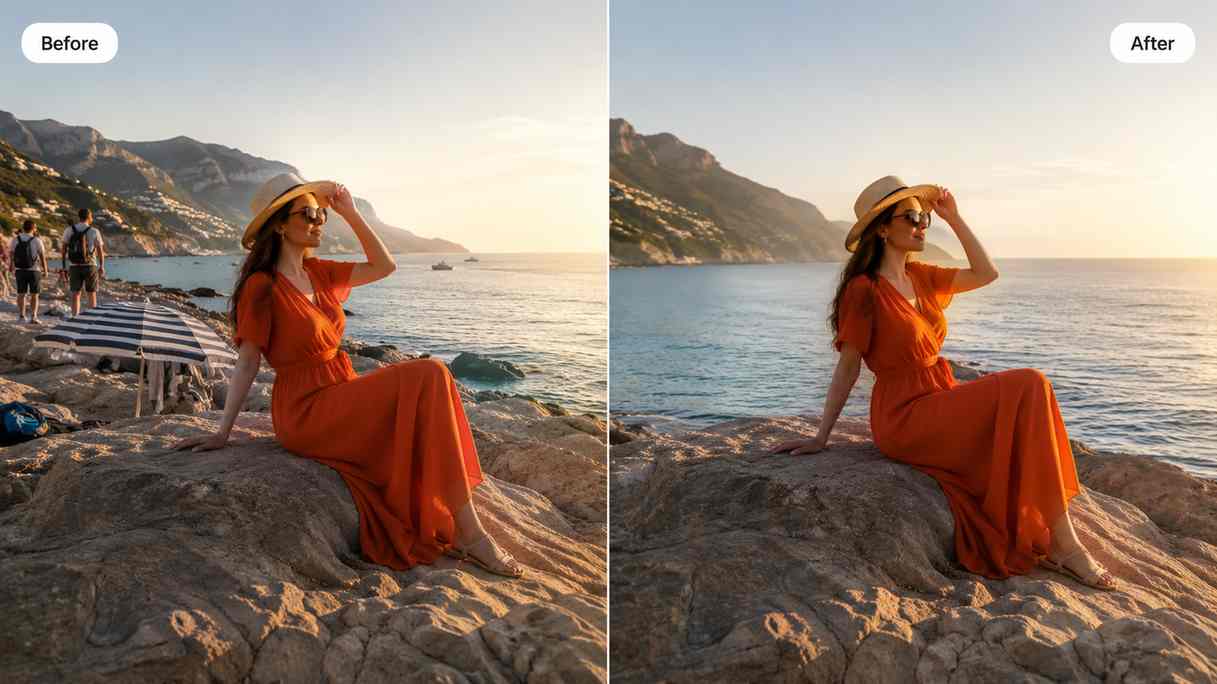
| Before cleanup | After cleanup |
|---|---|
| Random objects compete with the subject | The main subject becomes easier to notice |
| Background feels messy or unfinished | Image looks cleaner and more intentional |
| Product photo may feel less professional | Product appears more polished and store-ready |
| Social image may look too busy on mobile | Final image is easier to understand quickly |
| Manual cleanup can take too long | AI cleanup speeds up repetitive editing work |
Tips for more natural object removal
AI object removal is powerful, but a few editing habits can make the final result look much better.
- Remove one object at a time: Smaller edits are easier to review and fix.
- Include the object shadow: If the object casts a shadow, remove the shadow too.
- Use precise selections: Avoid selecting too much clean background unless needed.
- Zoom in after editing: Small artifacts are easier to spot before publishing.
- Keep the image realistic: Do not remove details that make the scene feel natural unless they distract from the subject.
- Use enhancement after cleanup: Enhance the final image only after the distracting elements are removed.
Object removal for ecommerce photos
For ecommerce, object removal can help product photos look more consistent. You can clean dust, remove background clutter, fix small distractions, and prepare the image for a cleaner product page.
However, product accuracy is important. Avoid removing or changing details that affect what the customer is buying. The final image should still represent the real product clearly.
A useful ecommerce workflow is to remove distractions first, then use background removal if the product needs a clean white or transparent background. After that, use AI enhancement to improve clarity and image upscaling for larger exports.
Object removal for social media and creator content
Social media images need to be readable quickly. On a small phone screen, clutter can make the image harder to understand. Removing a distracting object, messy background detail, or random person can help the image feel stronger without making it look over-edited.
For creators, object removal is especially useful for thumbnails, profile visuals, lifestyle photos, and campaign posts. The best edits are usually subtle. The viewer should notice the subject, not the editing.
Common mistakes to avoid
Here are the mistakes that can make object removal look unnatural:
- Removing too many objects until the image feels empty or fake.
- Leaving shadows, reflections, or object edges behind.
- Trying to remove a large object from a very detailed background in one pass.
- Over-enhancing the image after cleanup.
- Publishing without checking the edited area at full size.
How PixEdit helps clean photos faster
PixEdit gives you focused AI tools for cleaning and improving images. You can use object removal to erase distractions, background removal to isolate subjects, AI enhancement to improve clarity, and image upscaling to prepare sharper final exports.
This makes PixEdit useful for product photos, creator content, social media visuals, marketing assets, real estate images, and everyday photo cleanup. Instead of starting over with a new shoot, you can improve the image you already have.
Final thoughts
Removing unwanted objects from photos is one of the fastest ways to make an image look cleaner. The key is to edit with purpose. Remove distractions that weaken the image, keep the subject natural, review the result carefully, and export the final image for the platform where it will be used.
A clean photo does not need to look heavily edited. It just needs to help the viewer focus on what matters.
PixEdit workflow