

How to Make a Transparent Background PNG for Products and Designs
Transparent PNGs make images easier to reuse across ecommerce, design, marketing, and social media. This guide explains when to use transparent backgrounds, how to create clean cutouts, and how to export files correctly.

In this article
Quick checklist
A transparent background PNG is one of the most useful image formats for ecommerce, design, marketing, and content creation. It lets you remove the original background and keep only the subject, such as a product, person, logo-style object, sticker, or visual element.
Once the background is transparent, the image becomes easier to reuse. You can place it on a white product page, a colorful ad banner, a social media thumbnail, a website hero section, or a design mockup without carrying the original background with it.
What is a transparent background PNG?
A transparent background PNG is an image file where the area around the subject has no visible background. Instead of a white, black, or colored rectangle, the background is transparent. This allows the subject to blend into different layouts.
PNG is commonly used for transparency because it can preserve transparent pixels. JPG does not support transparency, so if you export a transparent image as JPG, the background will usually become white, black, or another solid color.
When should you use a transparent PNG?
Transparent PNGs are useful when the subject needs to be reused in different places. Common use cases include:
- Product cutouts: Place products on white backgrounds, category pages, ads, or campaign graphics.
- Social media content: Put a person, product, or object on a custom background.
- Website graphics: Add clean visual elements to hero sections, cards, and landing pages.
- Thumbnails: Create creator-style cutouts that stand out on YouTube, TikTok, or short-form content.
- Design mockups: Reuse cutouts in banners, presentations, posters, and brand visuals.
- Stickers and assets: Prepare reusable image elements without a rectangular background.
Transparent PNG vs white background image
A transparent PNG and a white background image are not the same. Both can look clean, but they are used for different goals.
| Image type | Best for | Important note |
|---|---|---|
| Transparent PNG | Reusable cutouts, design assets, social graphics, product compositions | Supports transparency and can be placed on many backgrounds |
| White background JPG | Marketplace product photos, product grids, ecommerce pages | Smaller file size, but the white background is part of the image |
If you need flexibility, use PNG. If you only need a clean product page image and want a lighter file, use JPG or WebP with a white background.
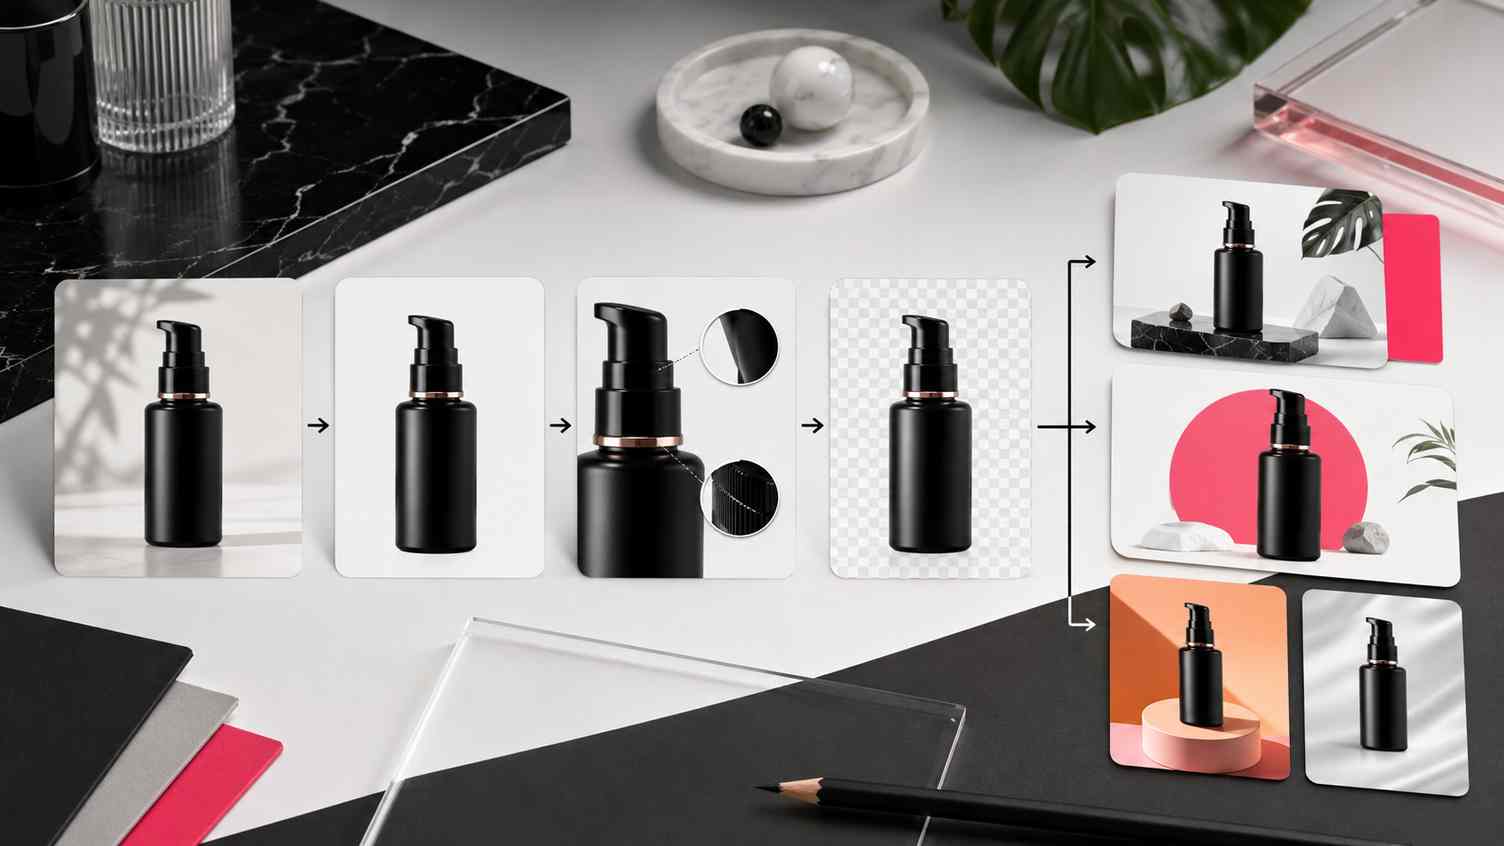
A simple workflow to make a transparent background PNG
The best transparent PNGs come from clean background removal and careful edge review. The goal is to create a subject cutout that looks natural when placed on another layout.
Step 1: Choose a clear source image
Start with a photo where the subject is easy to see. The subject should not blend too much into the background. Strong lighting, clear edges, and enough contrast help AI background removal produce a cleaner result.
Step 2: Remove the background
Use an AI background remover to separate the subject from the original background. For products, check corners, handles, straps, reflections, fabric edges, and transparent materials. For people, check hair, clothing edges, and small details around the outline.
Step 3: Review and clean the edges
After background removal, zoom in. Look for leftover background pixels, rough outlines, missing subject parts, or unnatural cutout edges. A transparent PNG may look fine on a checkerboard preview, but issues become obvious when you place it on a dark or colorful background.
Step 4: Remove small distractions
If the subject itself has dust, marks, clutter, or small unwanted details, clean them before export. For ecommerce, this helps make the product look more polished without changing what the item really is.
Step 5: Export as PNG
Export the final image as PNG when transparency matters. Do not export as JPG if you need a transparent background. If your website or design workflow supports it, you can also create optimized versions for faster loading.
Before and after: why transparent backgrounds are useful
Removing the background turns a fixed photo into a flexible visual asset. You are no longer locked into the original scene, color, lighting, or surface around the subject.
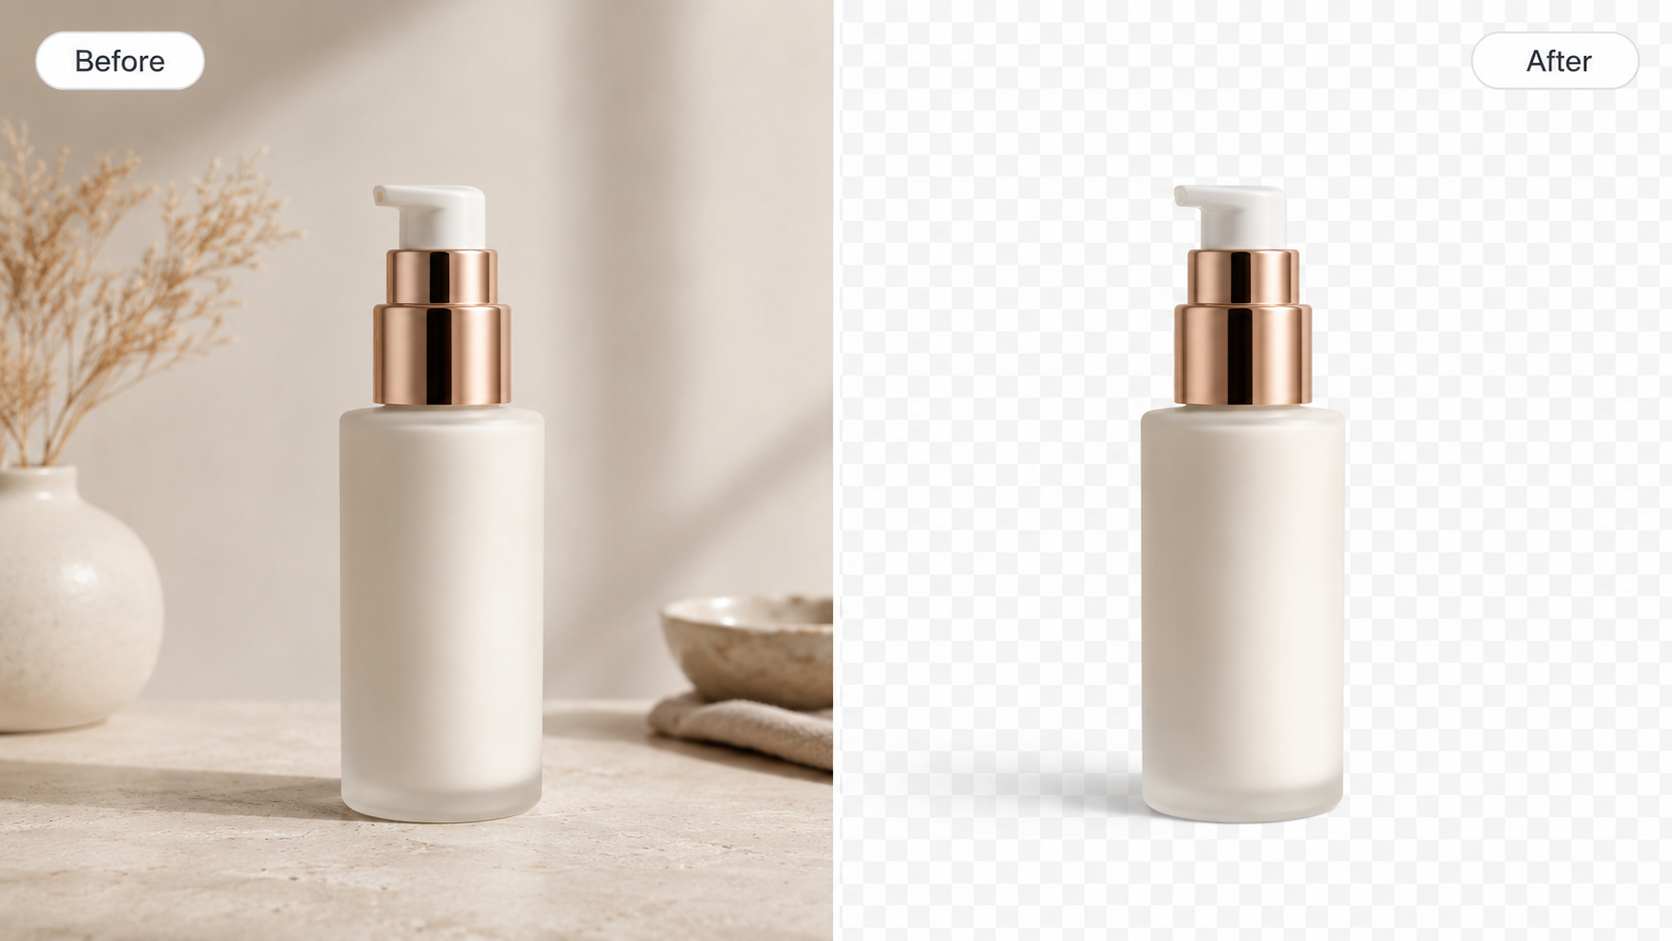
| Before transparent background | After transparent PNG |
|---|---|
| Subject is tied to the original background | Subject can be placed on new backgrounds |
| Product photos may look inconsistent | Product cutouts can share a cleaner style |
| Harder to use in ads or banners | Cutout can fit campaign layouts easily |
| Background may distract from the subject | Viewer focuses on the product or person |
| One image has limited reuse | One cutout can support many formats |
Best use cases for transparent PNGs
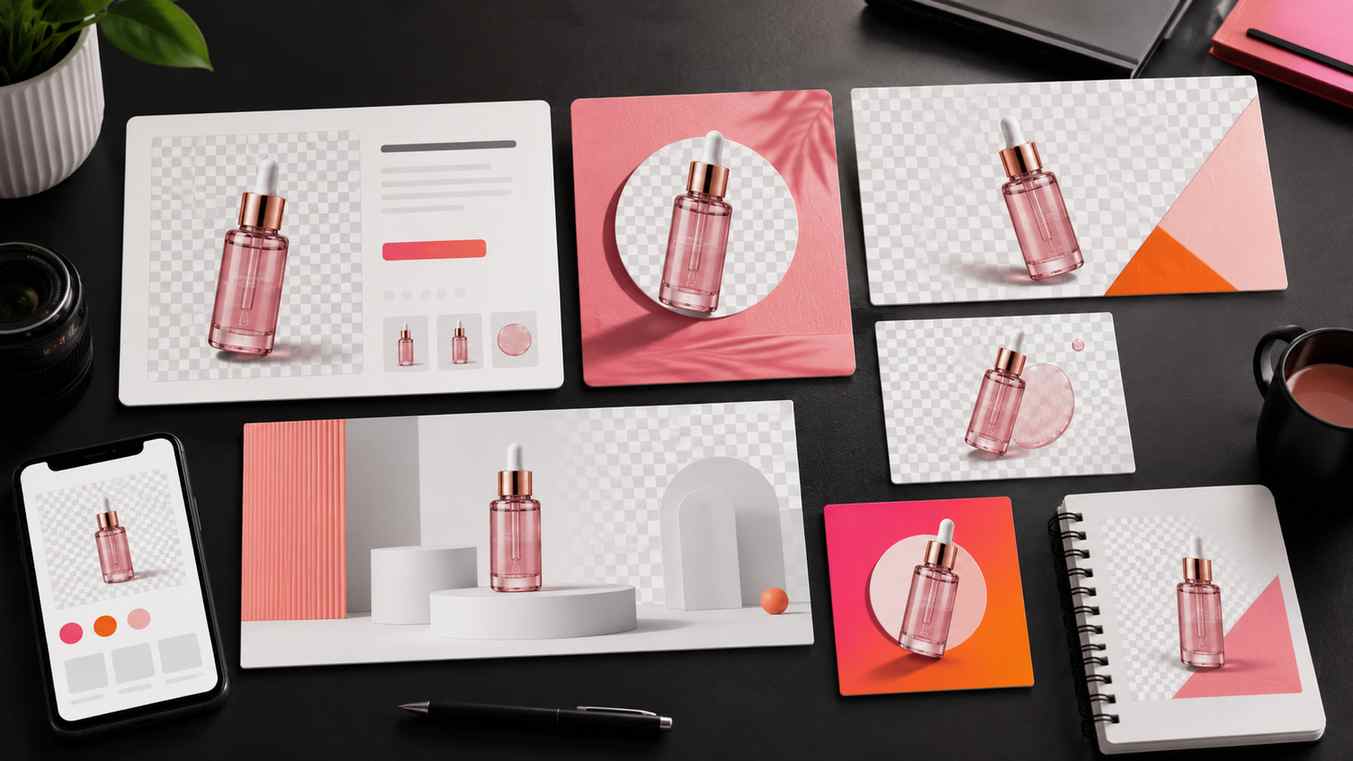
Transparent PNGs are especially valuable when you need one image to work across many layouts. A clean cutout can become part of product pages, social posts, ads, thumbnails, and design systems.
Ecommerce product photos
Product cutouts are useful for online stores because they make product images easier to standardize. Once a product is isolated, you can create white-background images, lifestyle compositions, category visuals, and ad creatives from the same cutout.
Social media images
Creators and brands often use transparent PNGs to build stronger posts, thumbnails, and promotional graphics. A person or product cutout can be placed on a bold background without needing a full design workflow from scratch.
Marketing and ad visuals
Transparent PNGs make campaign production faster. You can reuse the same subject across different ad sizes, banners, emails, and landing page sections while keeping the visual style consistent.
Website and landing page assets
Transparent images are useful for hero sections, feature cards, pricing pages, product showcases, and comparison blocks. They help visuals feel integrated into the page instead of looking like pasted rectangular photos.
Common mistakes when creating transparent PNGs
Transparent backgrounds are useful, but small mistakes can make cutouts look unprofessional. Watch for these issues:
- Rough edges: Always check the outline of the subject after background removal.
- Leftover background pixels: These are often visible when placing the PNG on a dark or colorful background.
- Missing details: Thin straps, hair, glass, fabric, and product handles can be accidentally removed.
- Wrong export format: JPG does not support transparency, so export PNG when you need a transparent background.
- Large file sizes: PNG files can be heavier than JPG, so optimize them when using them on websites.
- Flat-looking product cutouts: Sometimes a subtle natural shadow is needed when placing the subject on a new background.
How to check if your PNG is really transparent
A quick way to check transparency is to place the exported PNG on a different background color. Try a white background, a dark background, and a colored background. If you see a rectangle around the image, the file is not truly transparent.
You should also zoom in around the subject edges. Clean transparent PNGs should not have obvious halos, jagged outlines, or background fragments.
How PixEdit helps create transparent PNGs
PixEdit helps you create transparent PNGs with focused AI editing tools. You can use background removal to isolate the subject, object removal to clean distractions, AI enhancement to improve clarity, and image upscaling when you need a sharper final asset.
This workflow is useful for ecommerce sellers, creators, marketers, designers, and website owners who need clean cutouts without spending time on manual masking.
Final thoughts
A transparent background PNG gives you flexibility. It turns a normal image into a reusable visual asset that can fit product pages, ads, thumbnails, social posts, mockups, and landing pages.
Start with a clear image, remove the background carefully, review the edges, clean small distractions, and export as PNG when transparency matters. A clean cutout can save time across many future designs.
PixEdit workflow